 A hot, crisp, skinny baguette straight out of the oven…so delicious and so very French! Jacques Pepin, once the personal chef to Charles De Gaulle, says that for his last meal on earth he would have fresh French bread with butter. He’s right…simple and classic is always the best way to go.
My favorite memory of baguettes is hearing people munch on their mid-day lunch sandwiches from Paul Boulangerie while taking the TGV train from Paris to Avignon. The sound of people sinking their teeth into that hearty, crispy crust is so haunting…in the best way possible, I must say!

This recipe is for small, thin French baguettes, the type you get in pre-made sandwich form at boulangeries in France. I love the size of these baguettes because they are perfectly individual and not made for sharing.
As simple as this recipe is, I can’t take credit for it. I made these during my first class of professional baking at the New School of Cooking, and haven’t thought of a good reason to look for another recipe since.
I’ve made these baguettes so that I can stuff them with thinly sliced Lapsang Souchong Brined Turkey Breast and Roquefort Cheese, but fresh out of the oven, these classic French baguettes can be more simply enjoyed with some fresh fruit preserves and hot, brisk cup of flavored black tea.

French Sandwich Baguettes
Makes 4 baguettes.
Ingredients:
2 teaspoons SAF yeast
1 cup water at room temperature
2 1/2 cups bread flour
1 1/2 tsp salt
semolina flour
bench flour
sesame seeds (optional)
Equipment:
stand mixer
2- double french bread pans or regular half baking sheets
large casserole dish
serrated knife
spray bottle filled with water
cling wrap
Directions:
1.) With stand mixer with dough hook (or hands), mix together all ingredients except semolina flour for 5-7 minutes if using stand mixer, or 10 minutes if kneading by hand. Gather dough into a ball and place in a lightly oiled bowl, making sure to coat the dough ball completely in some of the same oil. Cover with cling wrap, and let the dough rise until tripled in size.
2.) After the dough has tripled in volume, dump it on a work surface scattered with bench flour and shape into an even 8″ x 6″ rectangle. Cut the dough in half to make two- 4″ x 6″ halves, then cut each half into half again. This will make four- 2″ x 6″ long rectangular pieces of dough.
3.) Stretch a piece of dough evenly to make a 10 inch long rectangle. Lengthwise, take the top seam of the rectangle and use your fingers to press the seam snugly into the center of the log. Repeat this seam-tucking process a second time, pinch the seam to seal, then roll the log of dough evenly until it reaches a length of 10-14 inches (depends on how long you want your baguettes to be). Apply this process to the other 3 pieces of dough.
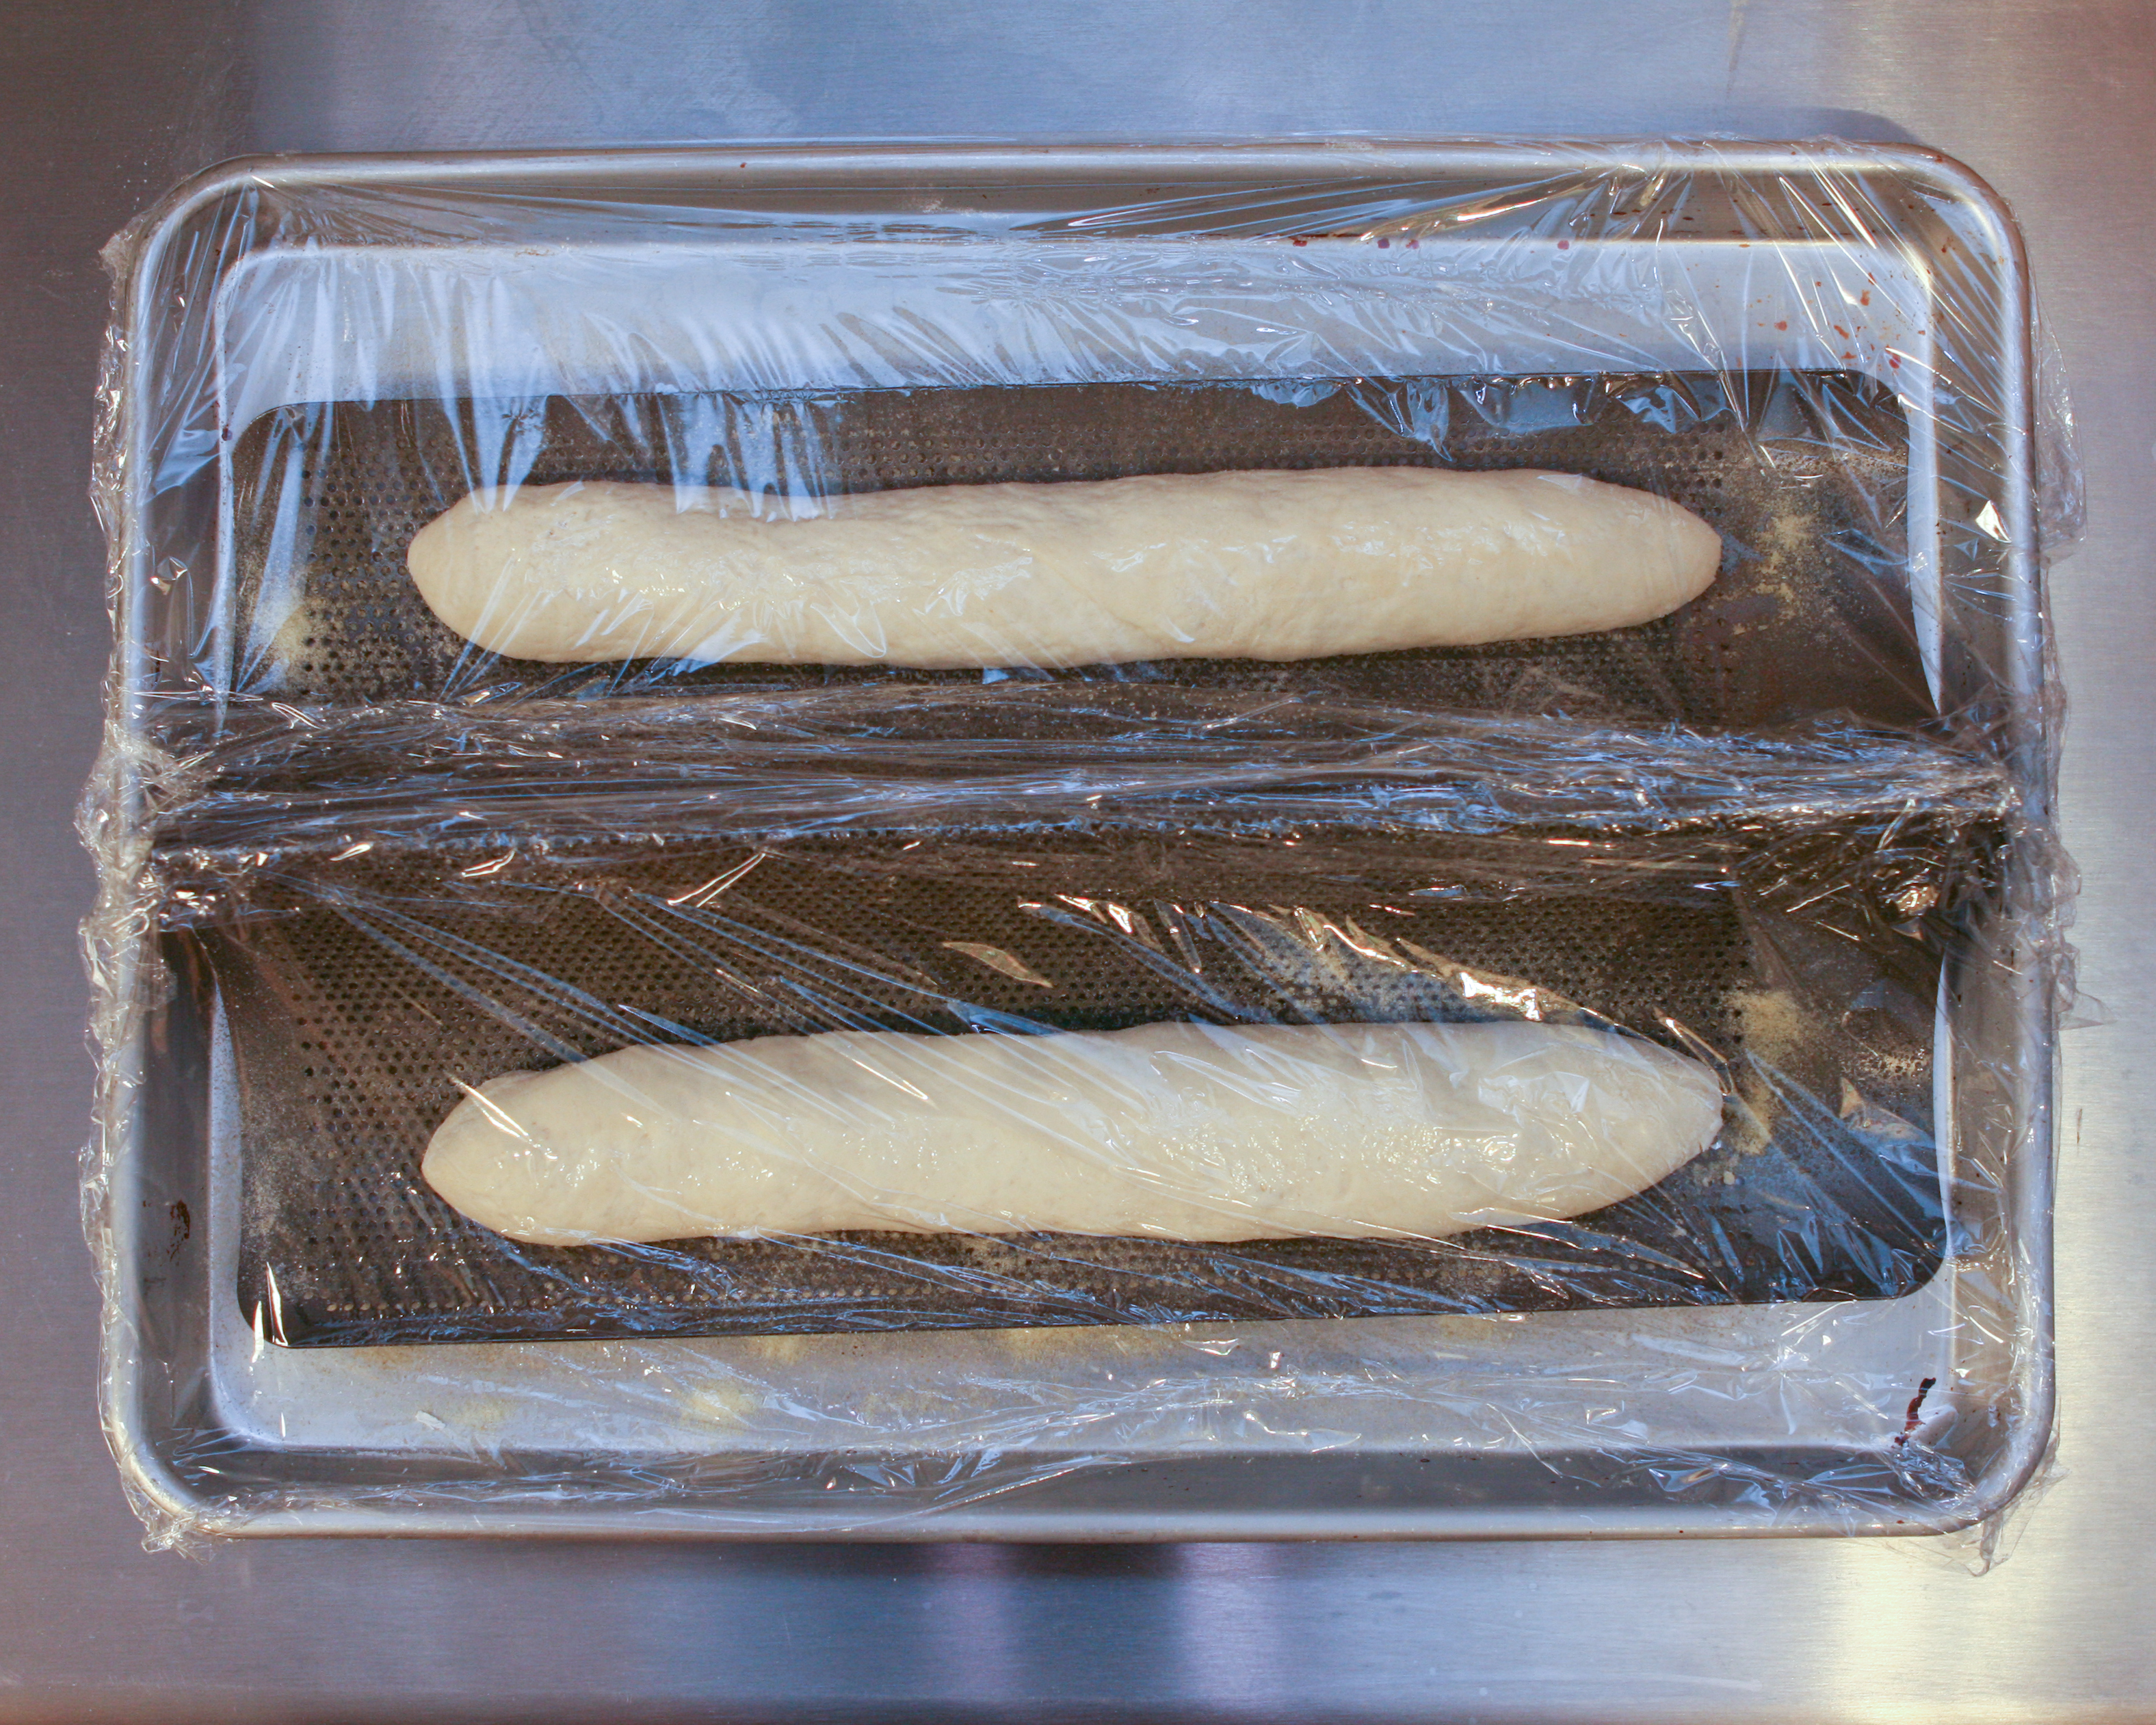
4.) Place baguette dough logs on a french bread pan or regular baking sheets lightly sprayed with non-stick spray and generously scattered with semolina flour. Cover pans with cling wrap and allow the baguettes to double in size.
5.) When the baguettes are almost fully doubled, preheat oven to 425 degrees F. Bring 4-6 cups of water to a full boil in a kettle. After the water reaches a full boil, place a large oven-safe empty casserole dish onto the bottom rack of the pre-heated oven. With the bottom rack slightly pulled out, pour the boiling water into the casserole dish, then carefully and slowly and push the bottom rack back into the oven. Close the oven door.
6.) After they have fully doubled in size, lightly spray the baguettes with water, and then sprinkle lightly with flour (or sesame seeds). Then use a serrated knife to cut air vents into the dough on a diagonal every two inches along the top of the baguette. Cut the vents without hesitation with one clean, deliberate stroke, about a 1/2″ deep from the dough surface. Now, spray the baguettes liberally and evenly with water from the spray bottle, and place the first pan of baguettes in the oven to bake for 20-25 minutes or until golden brown. Repeat with second pan after the first pan has baked.
Recipe adapted from Baguette recipe from New School of Cooking.
Step-By-Step:
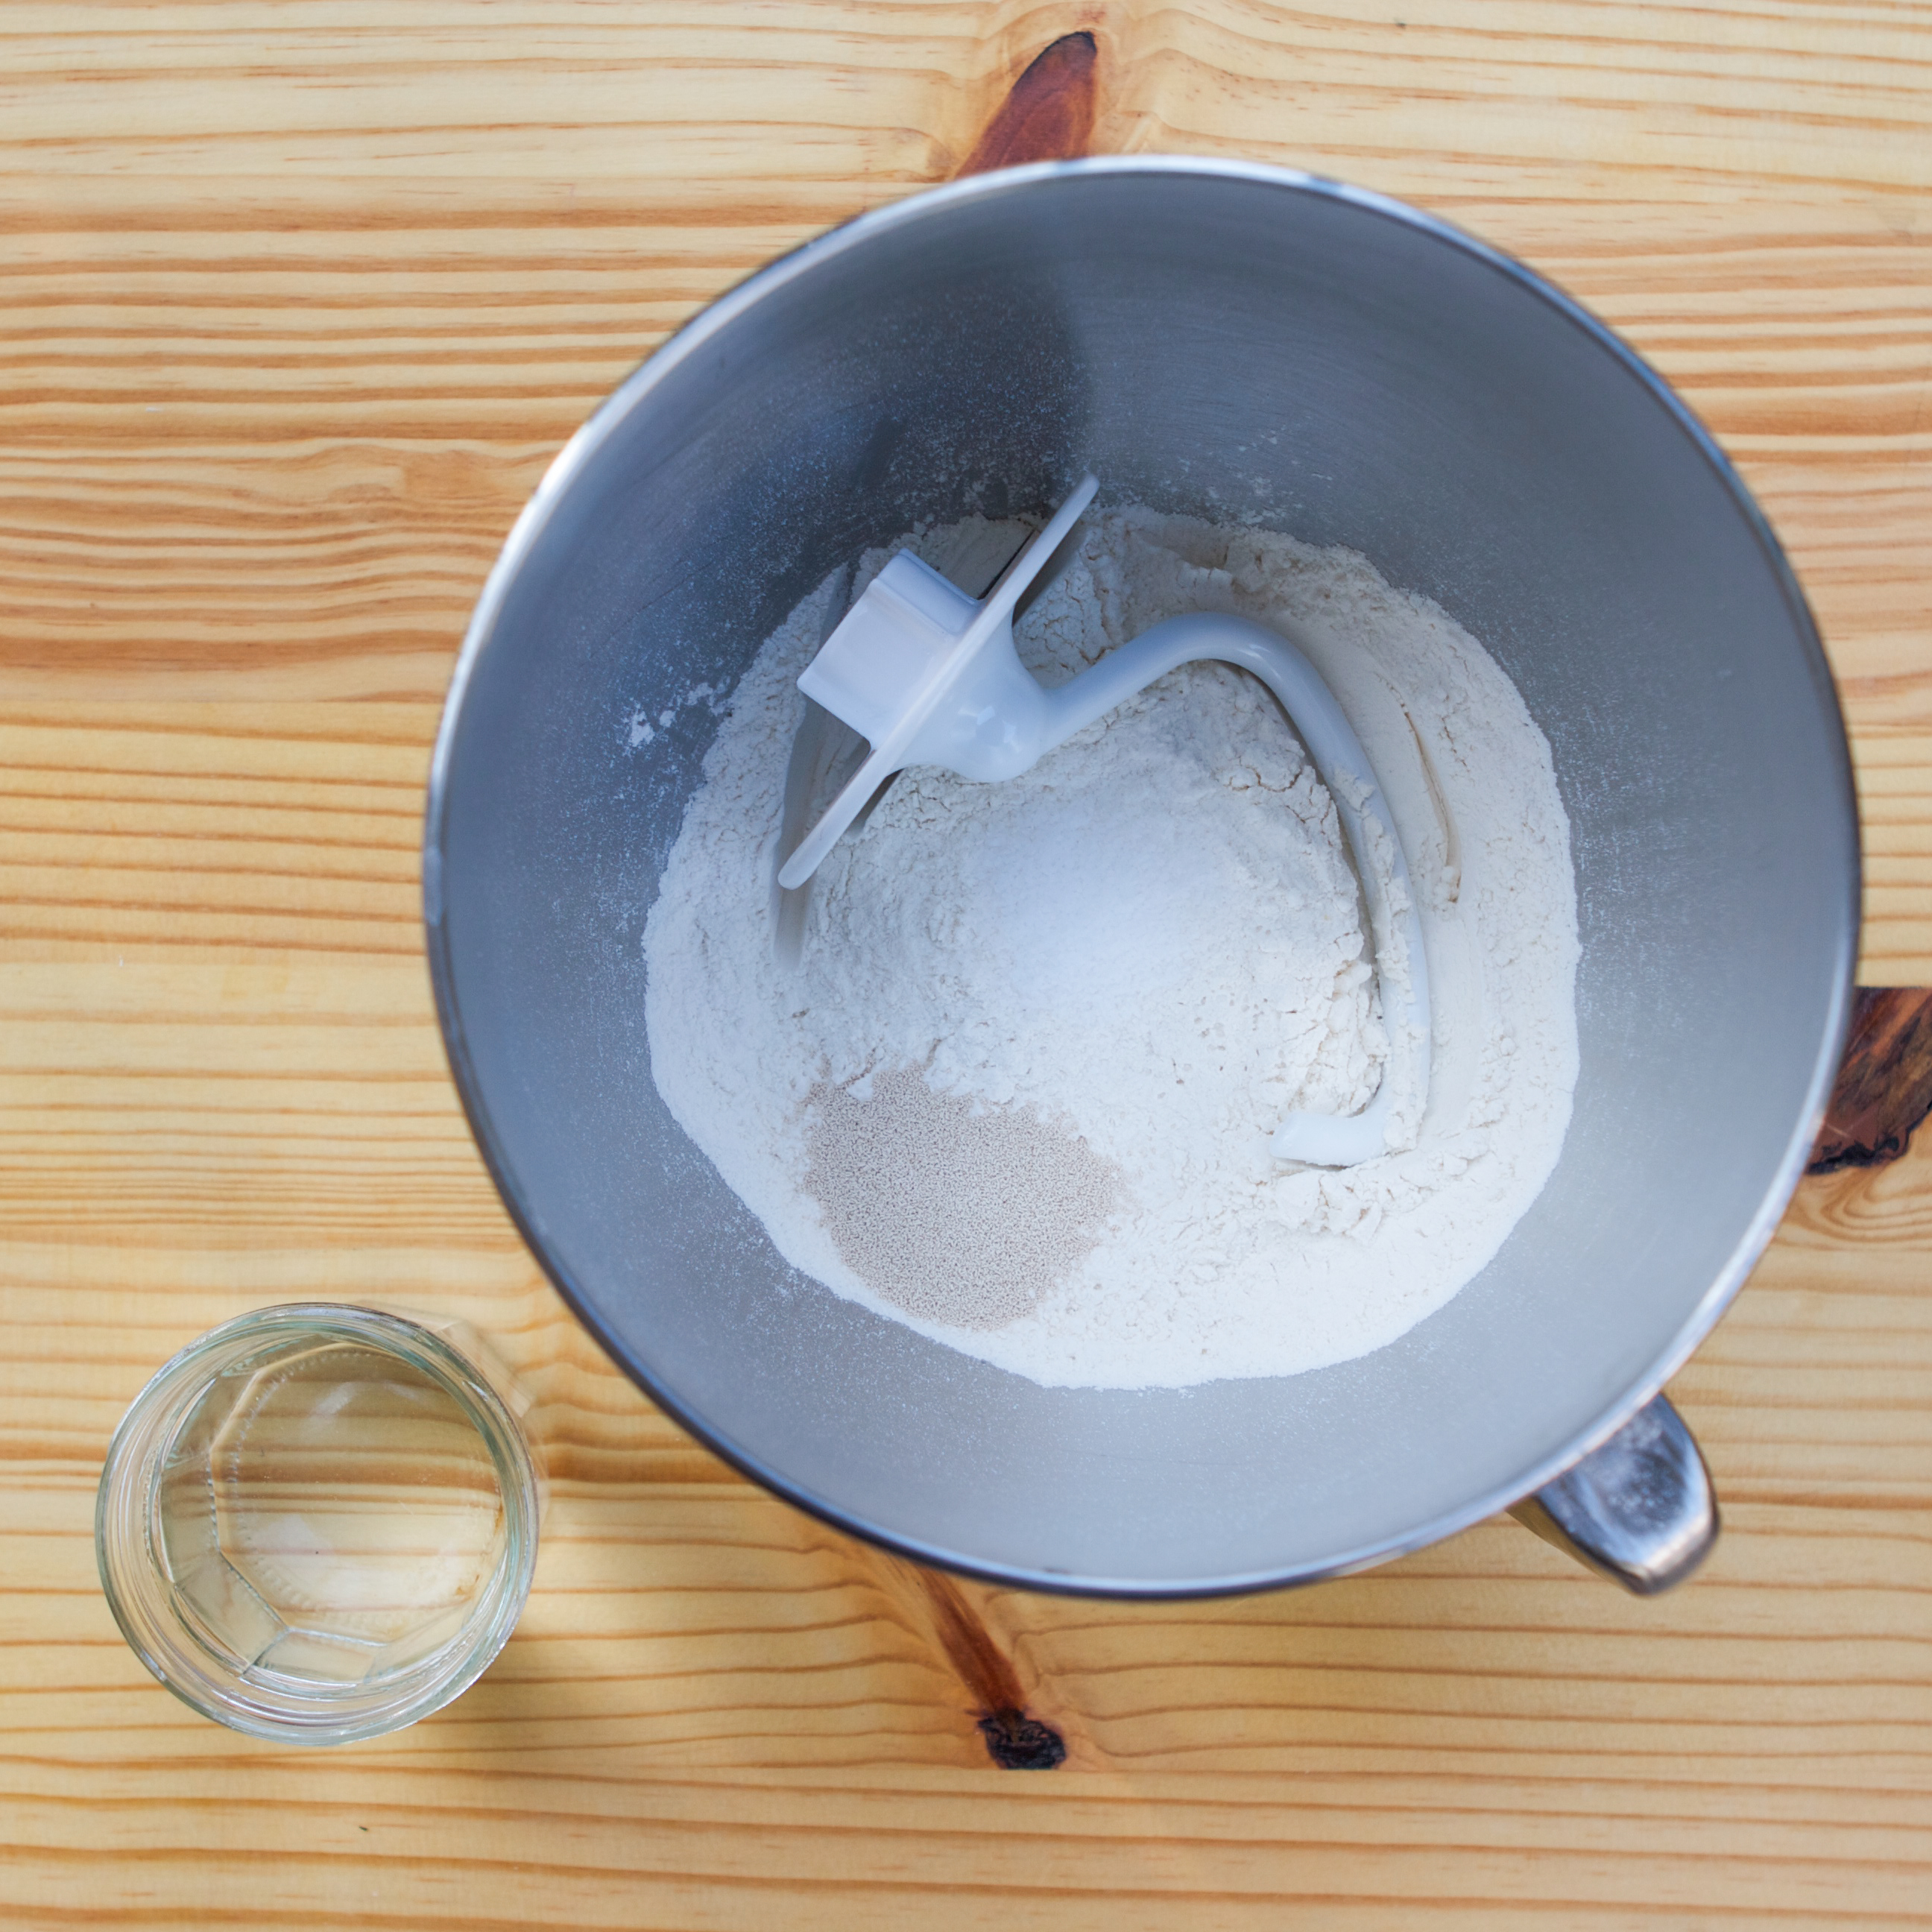
The simplest of ingredients: bread flour, yeast, salt, and water
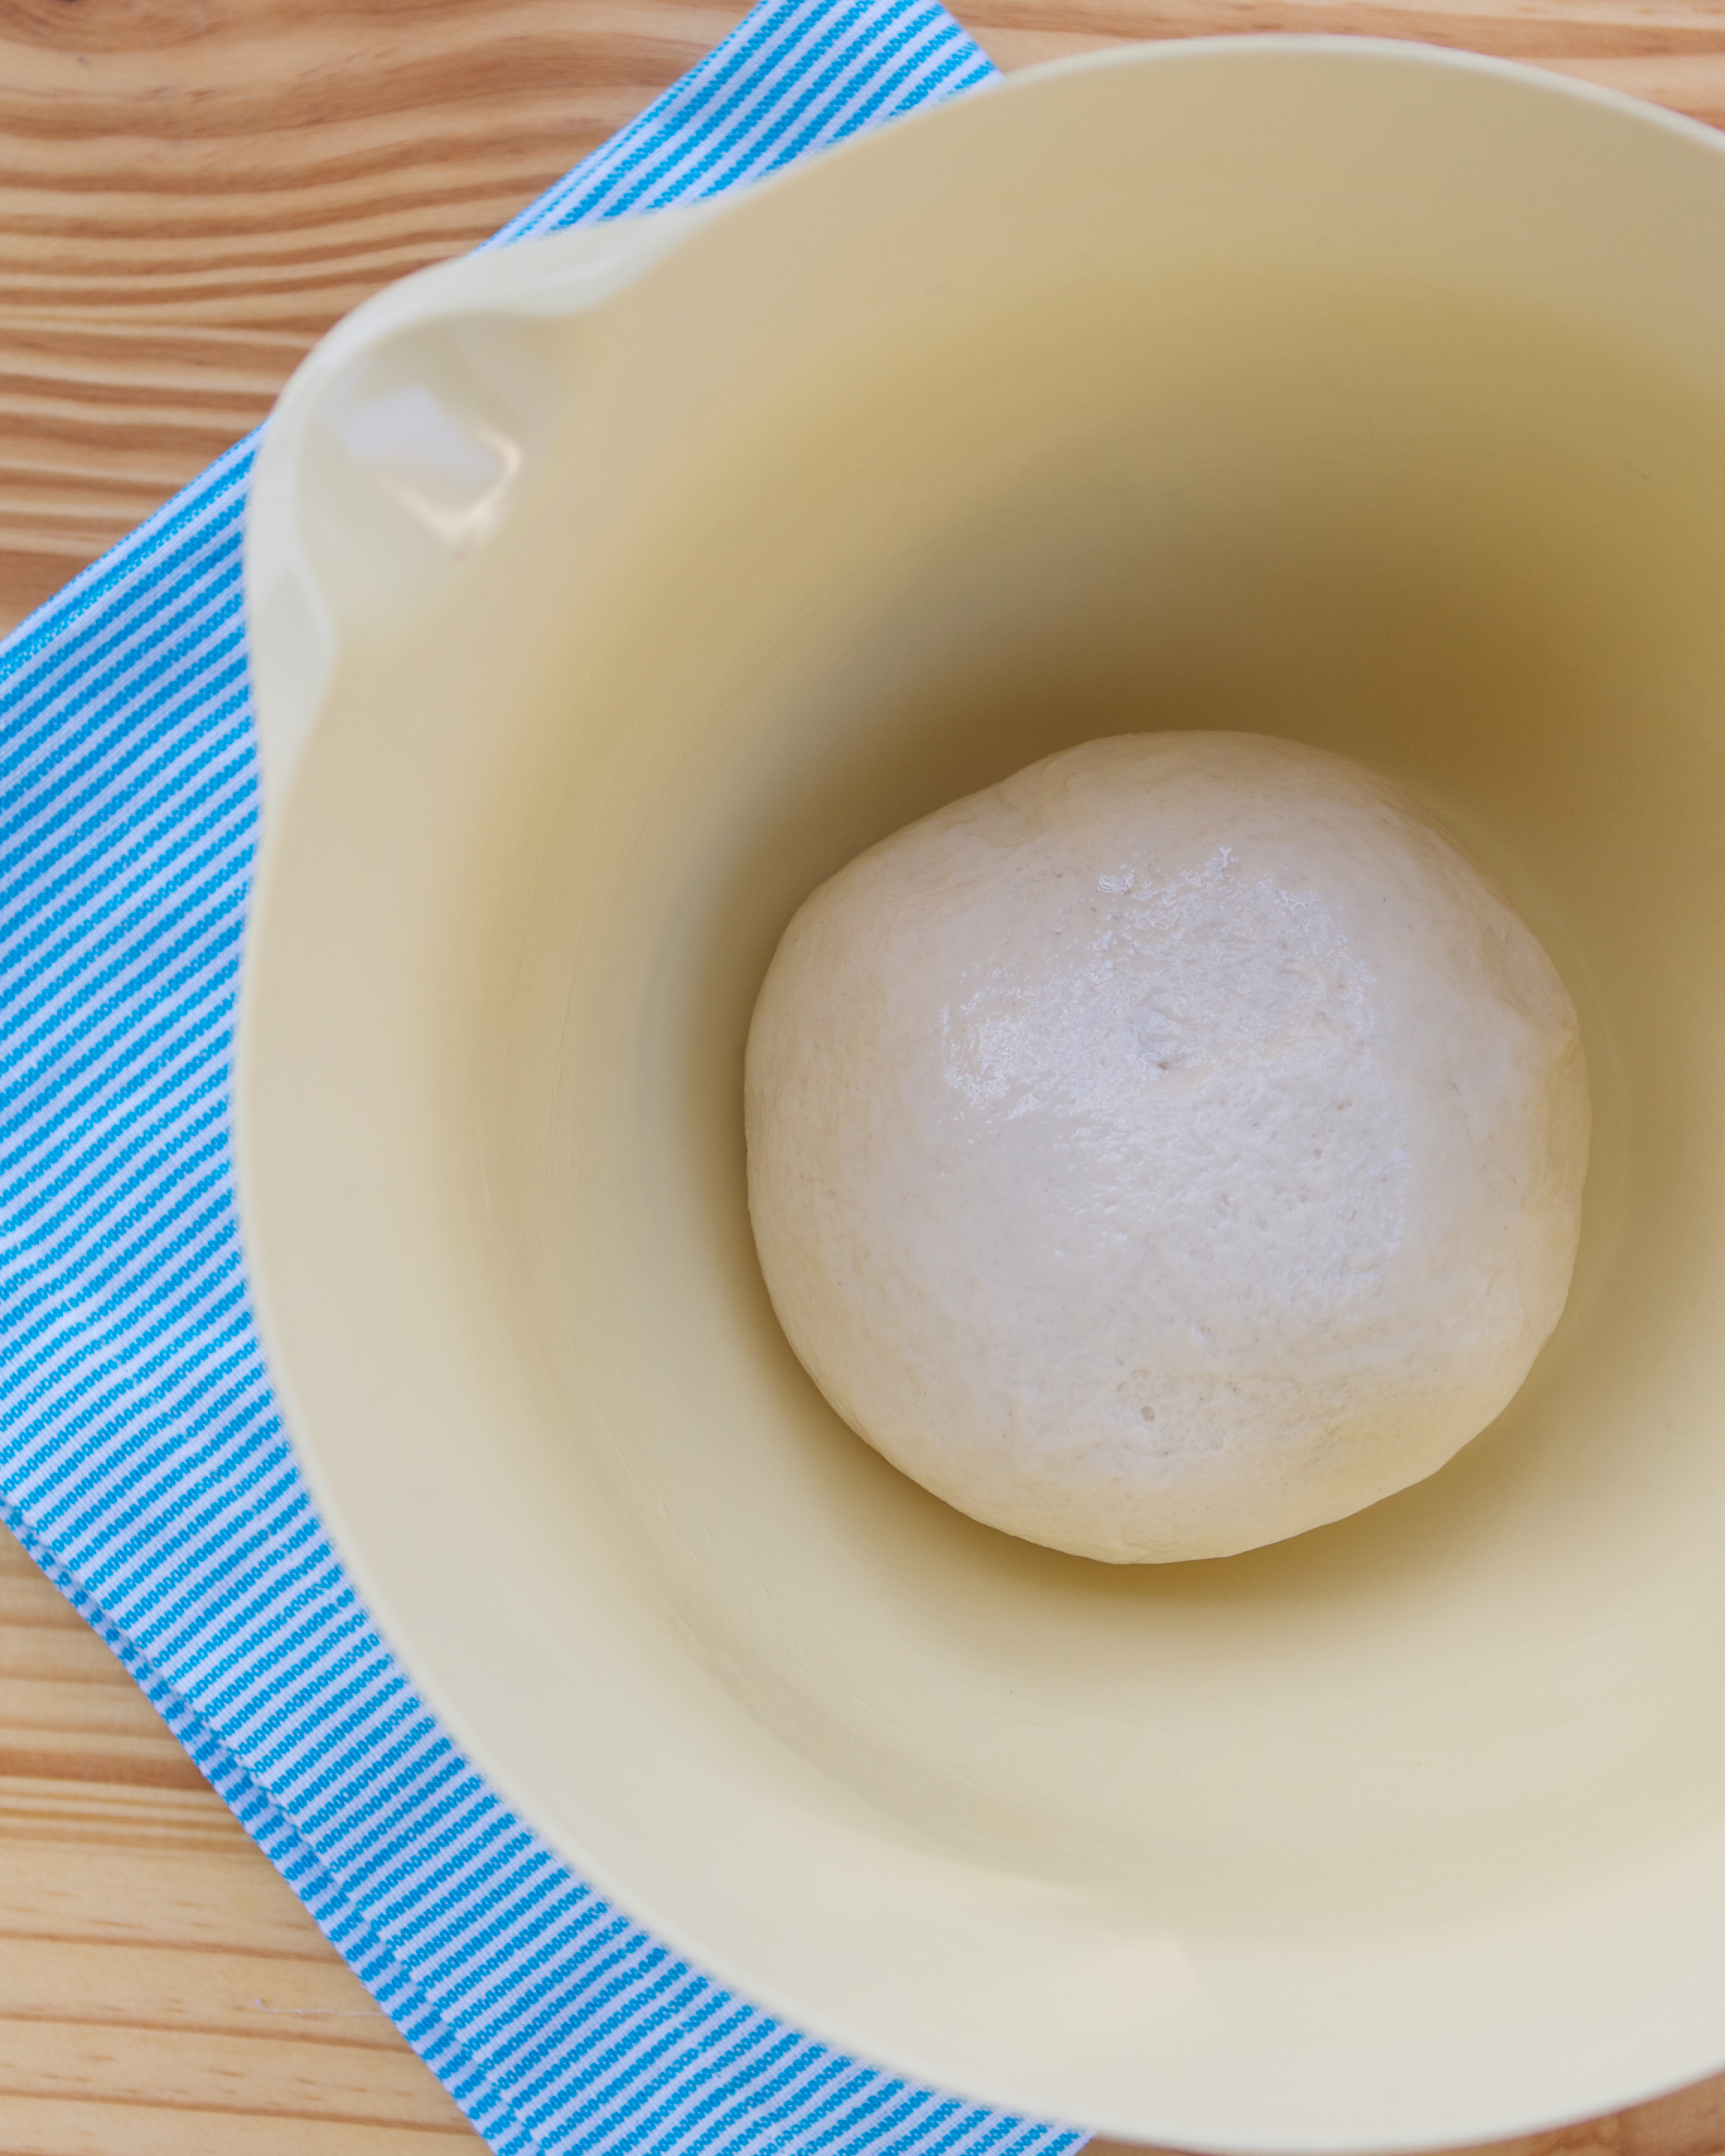
Mix all ingredients together to form a ball of dough
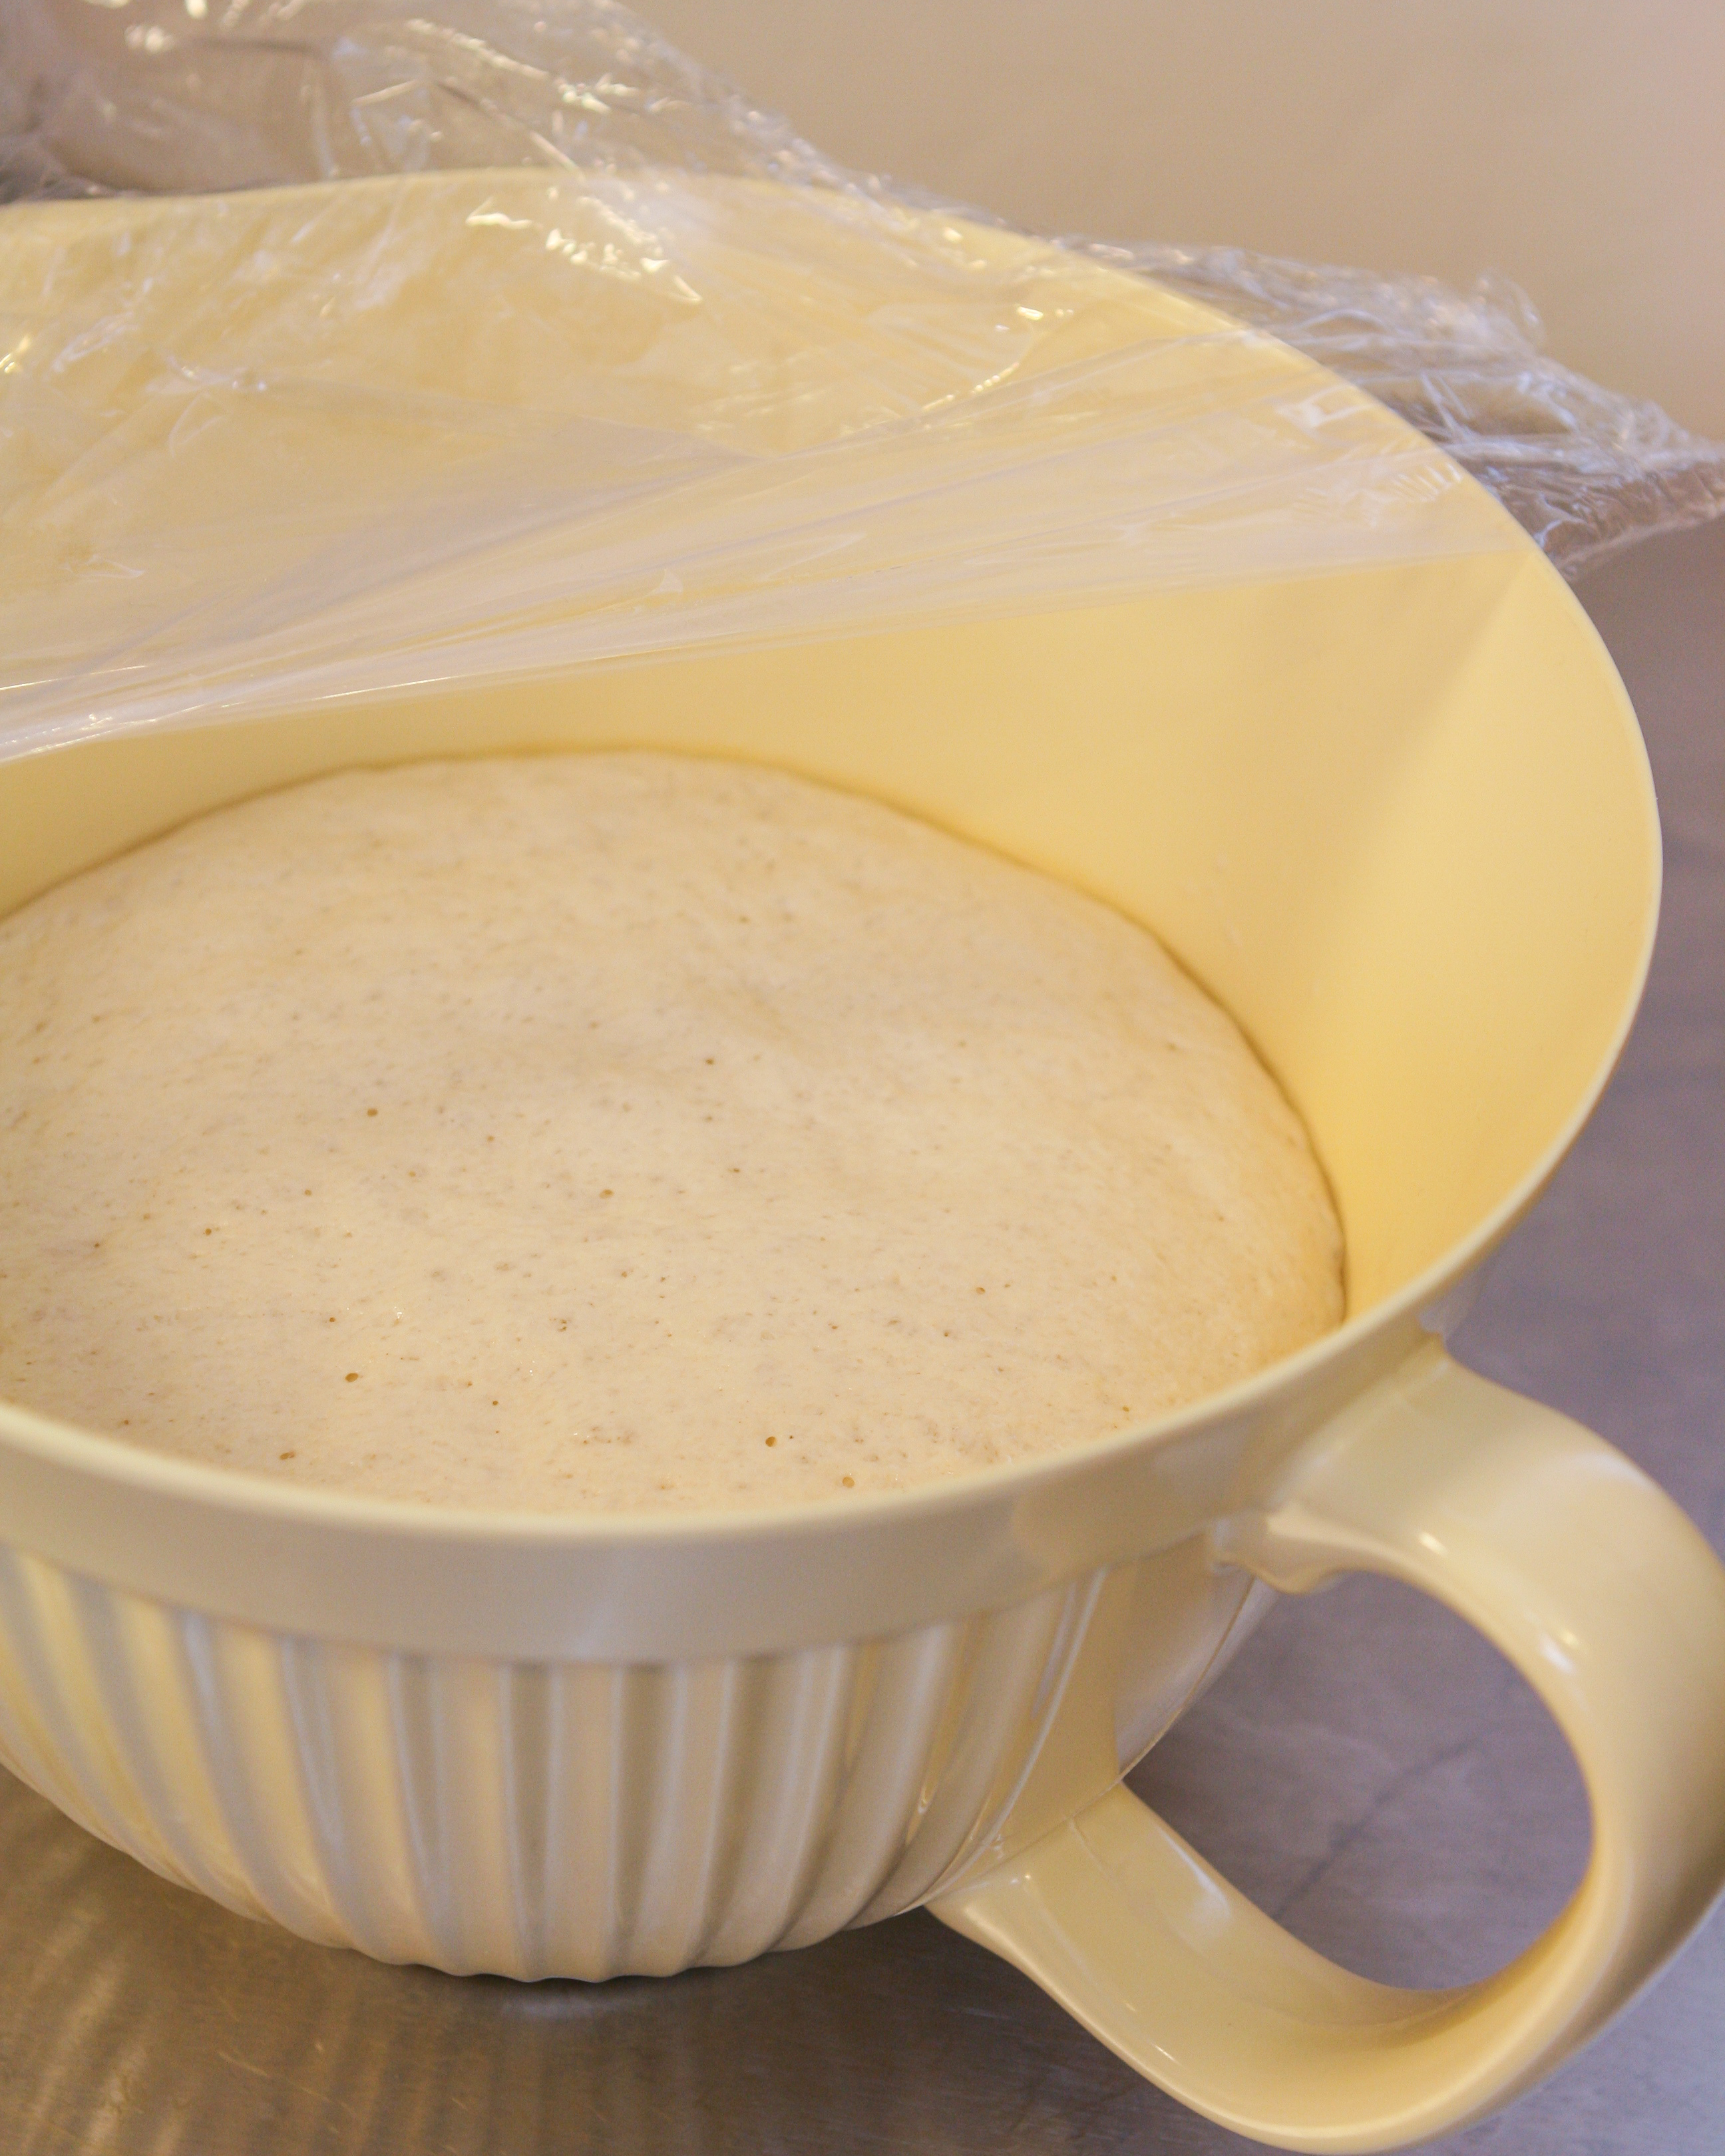
After first proof the dough should triple in volume
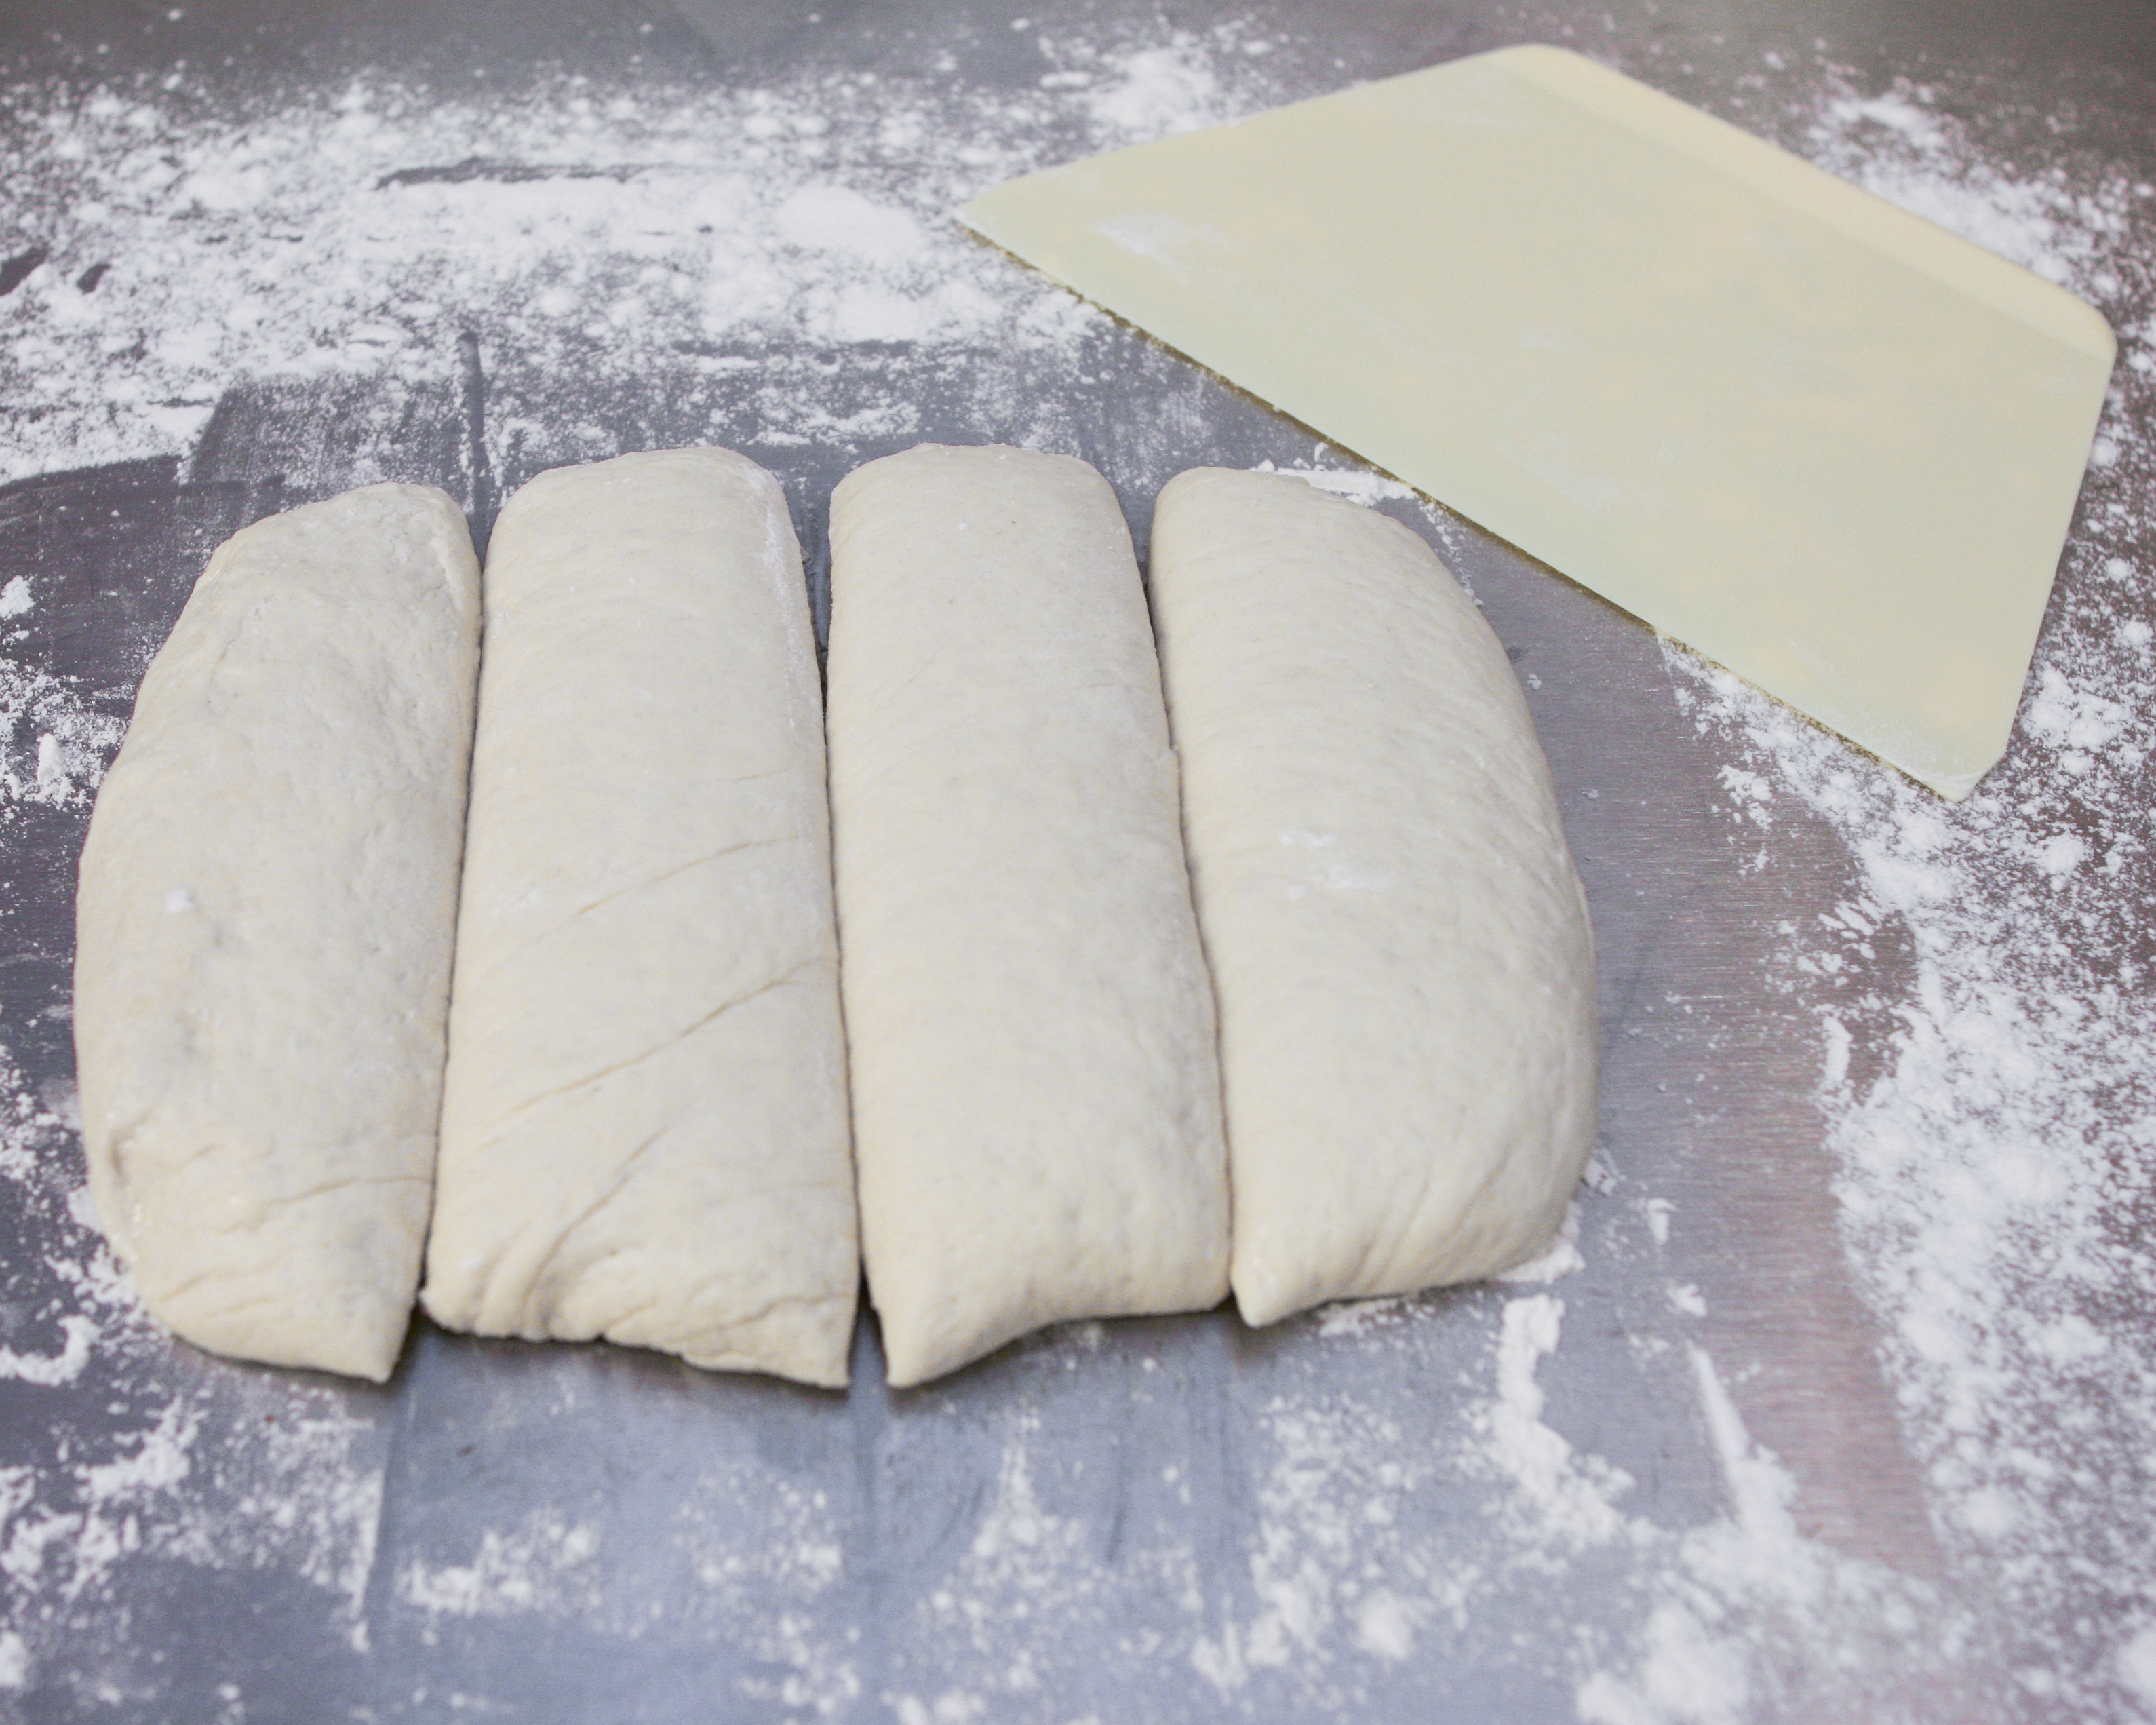
Divide dough into 4 rectangles
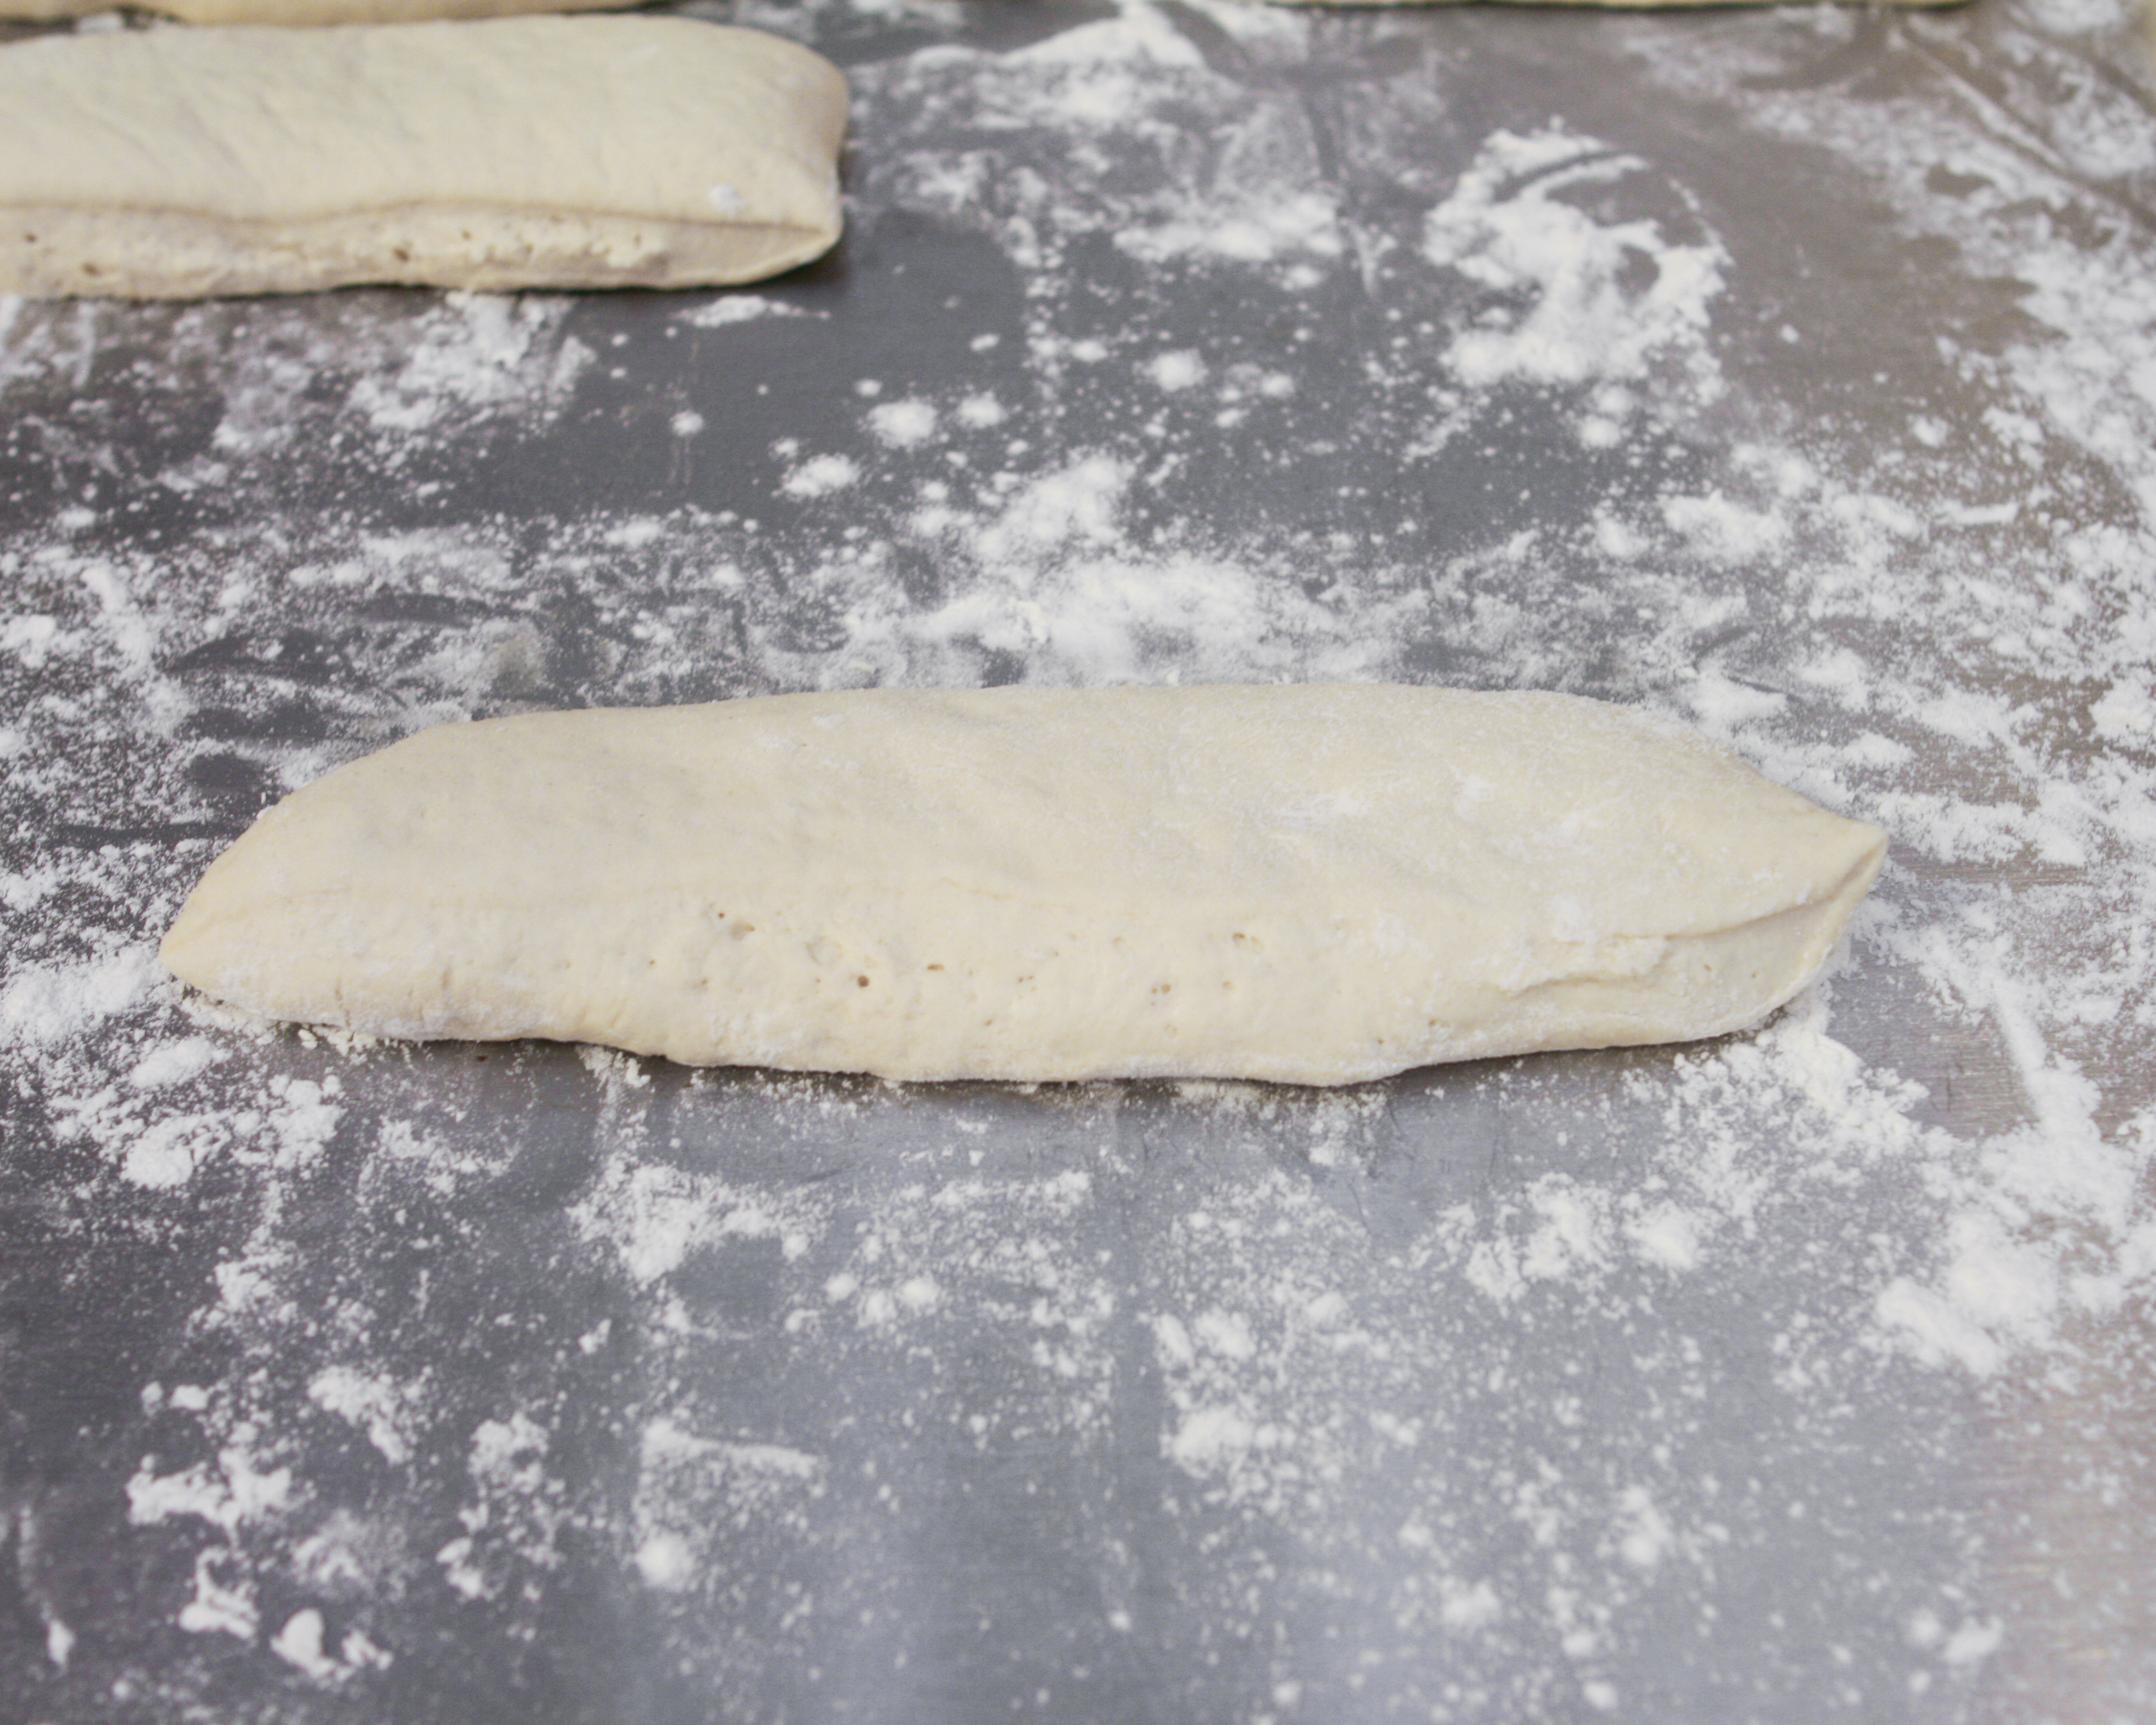
Start with one piece of dough

Take top edge of rectangular piece and tuck it into the center of the dough lengthwise
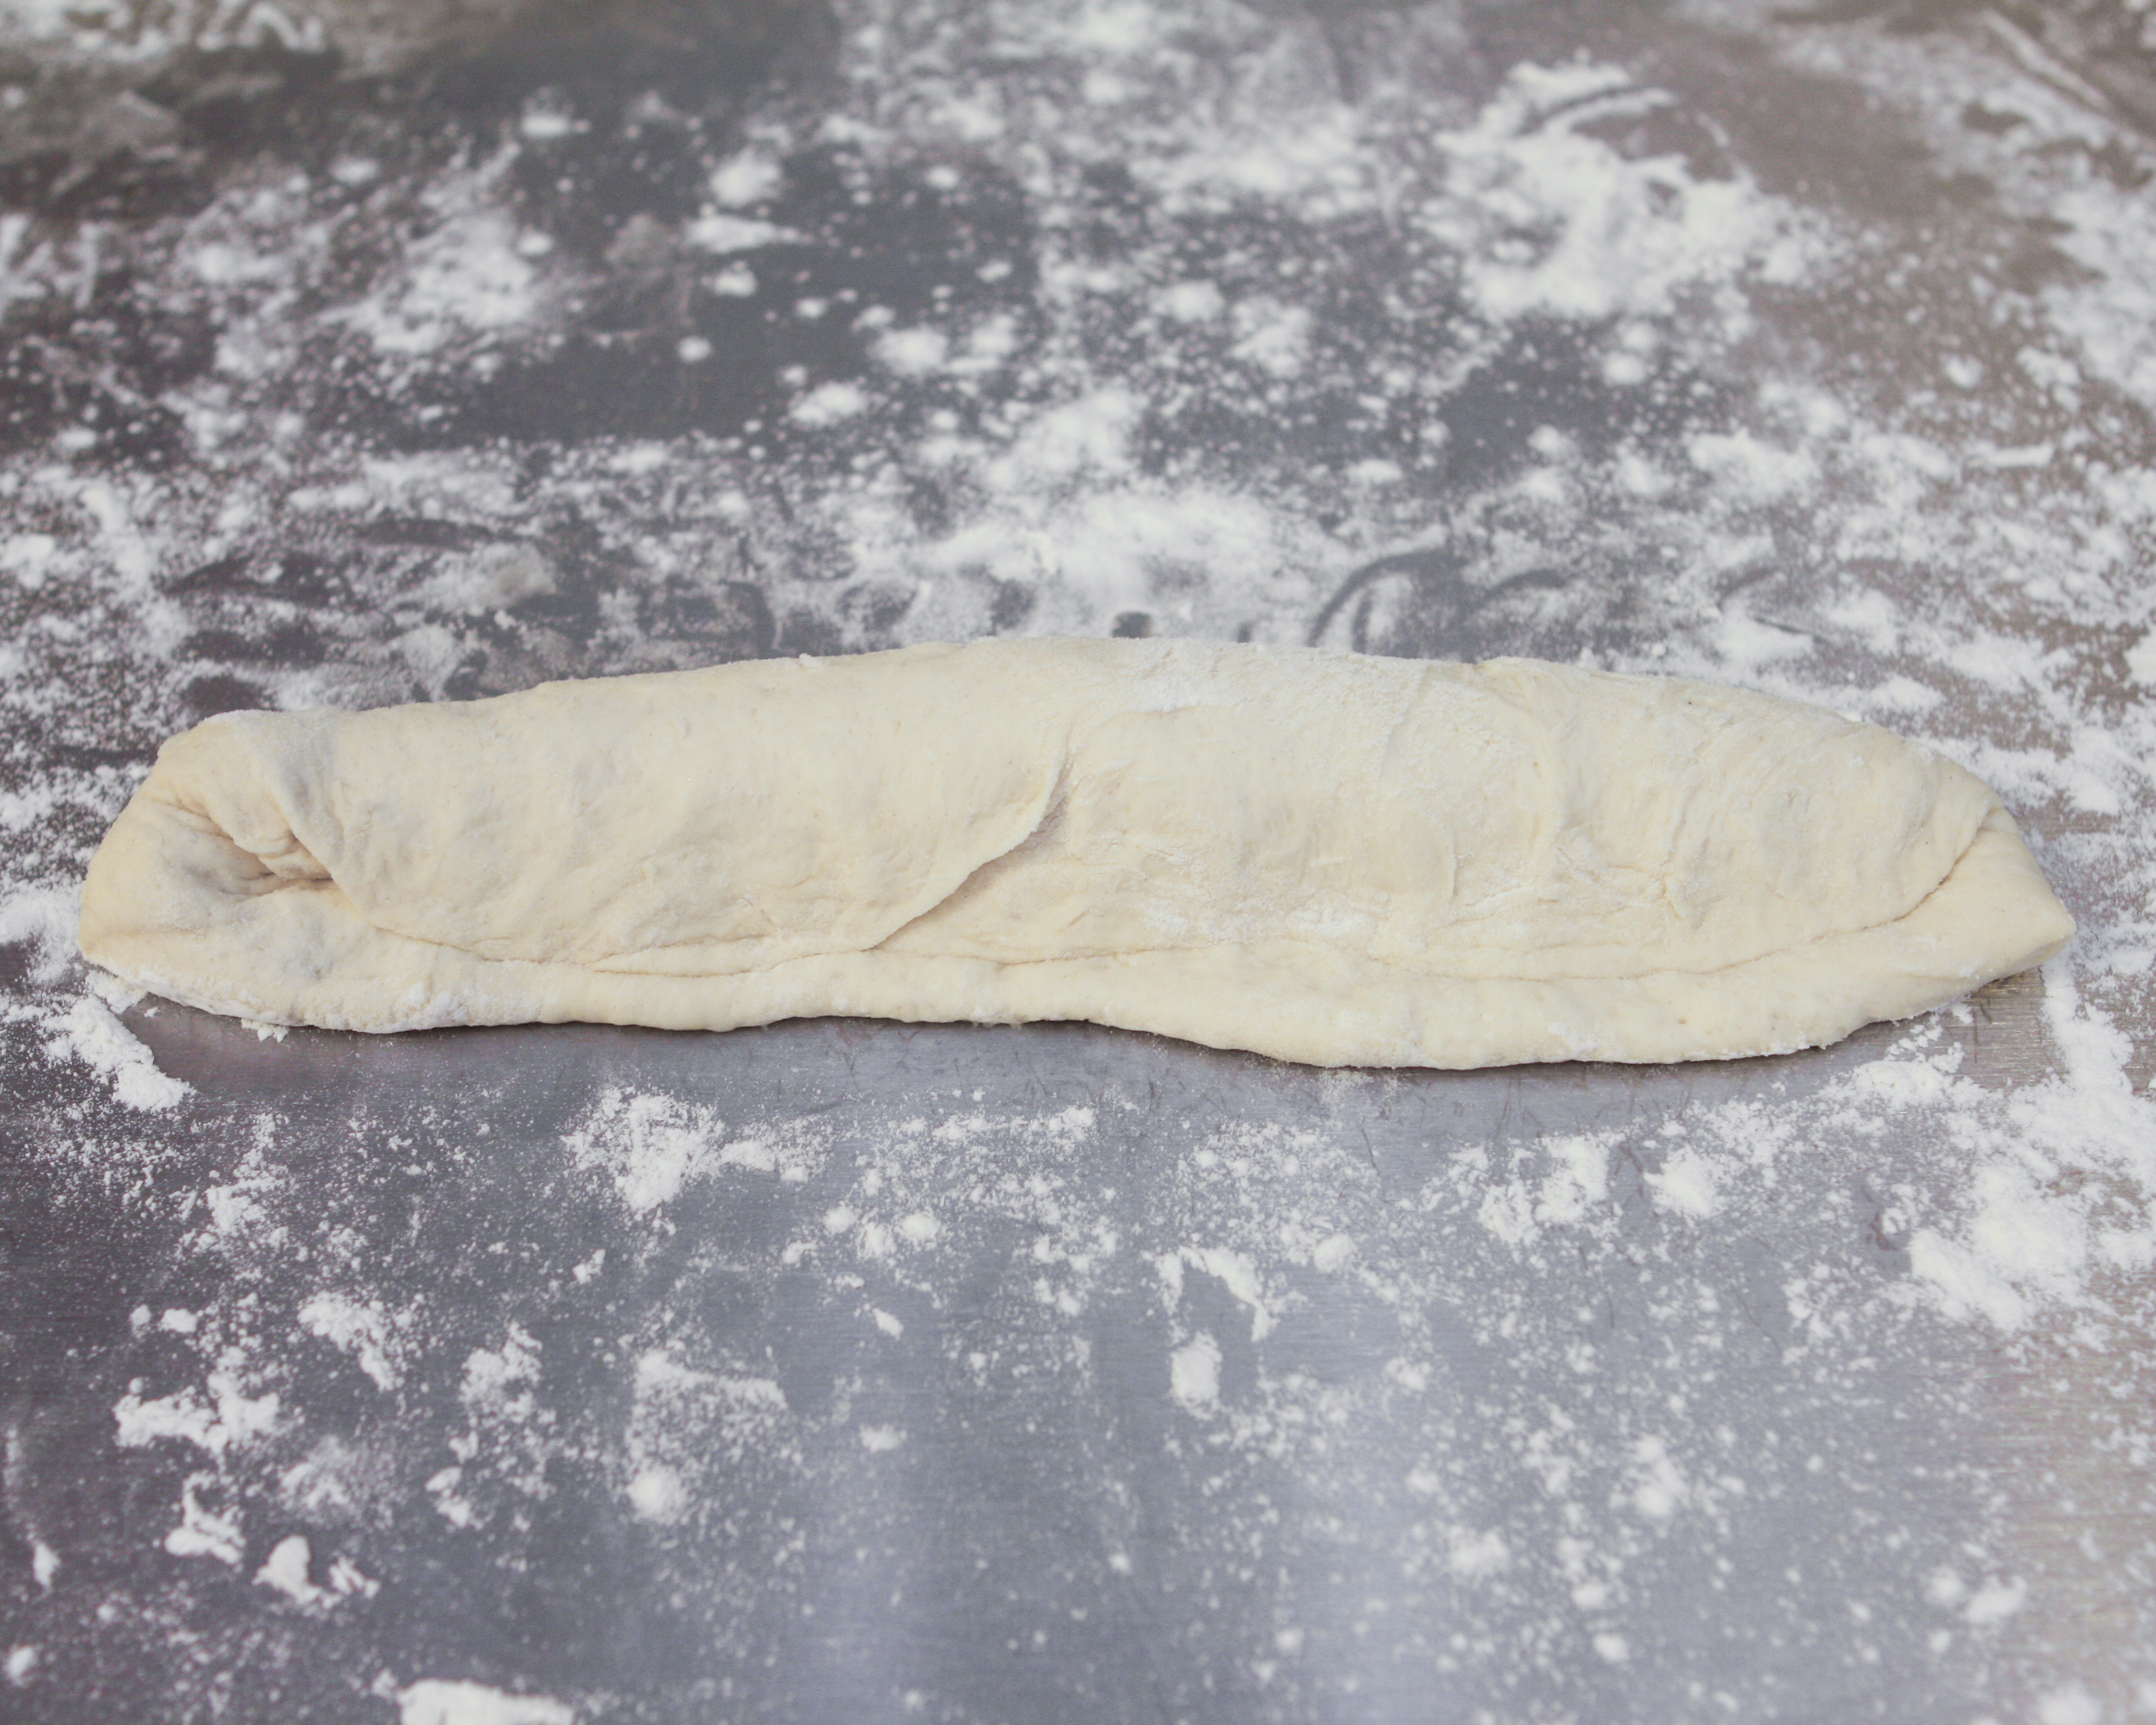
For a second time, tuck top edge of dough into center of dough lengthwise, then pinch the sea to seal
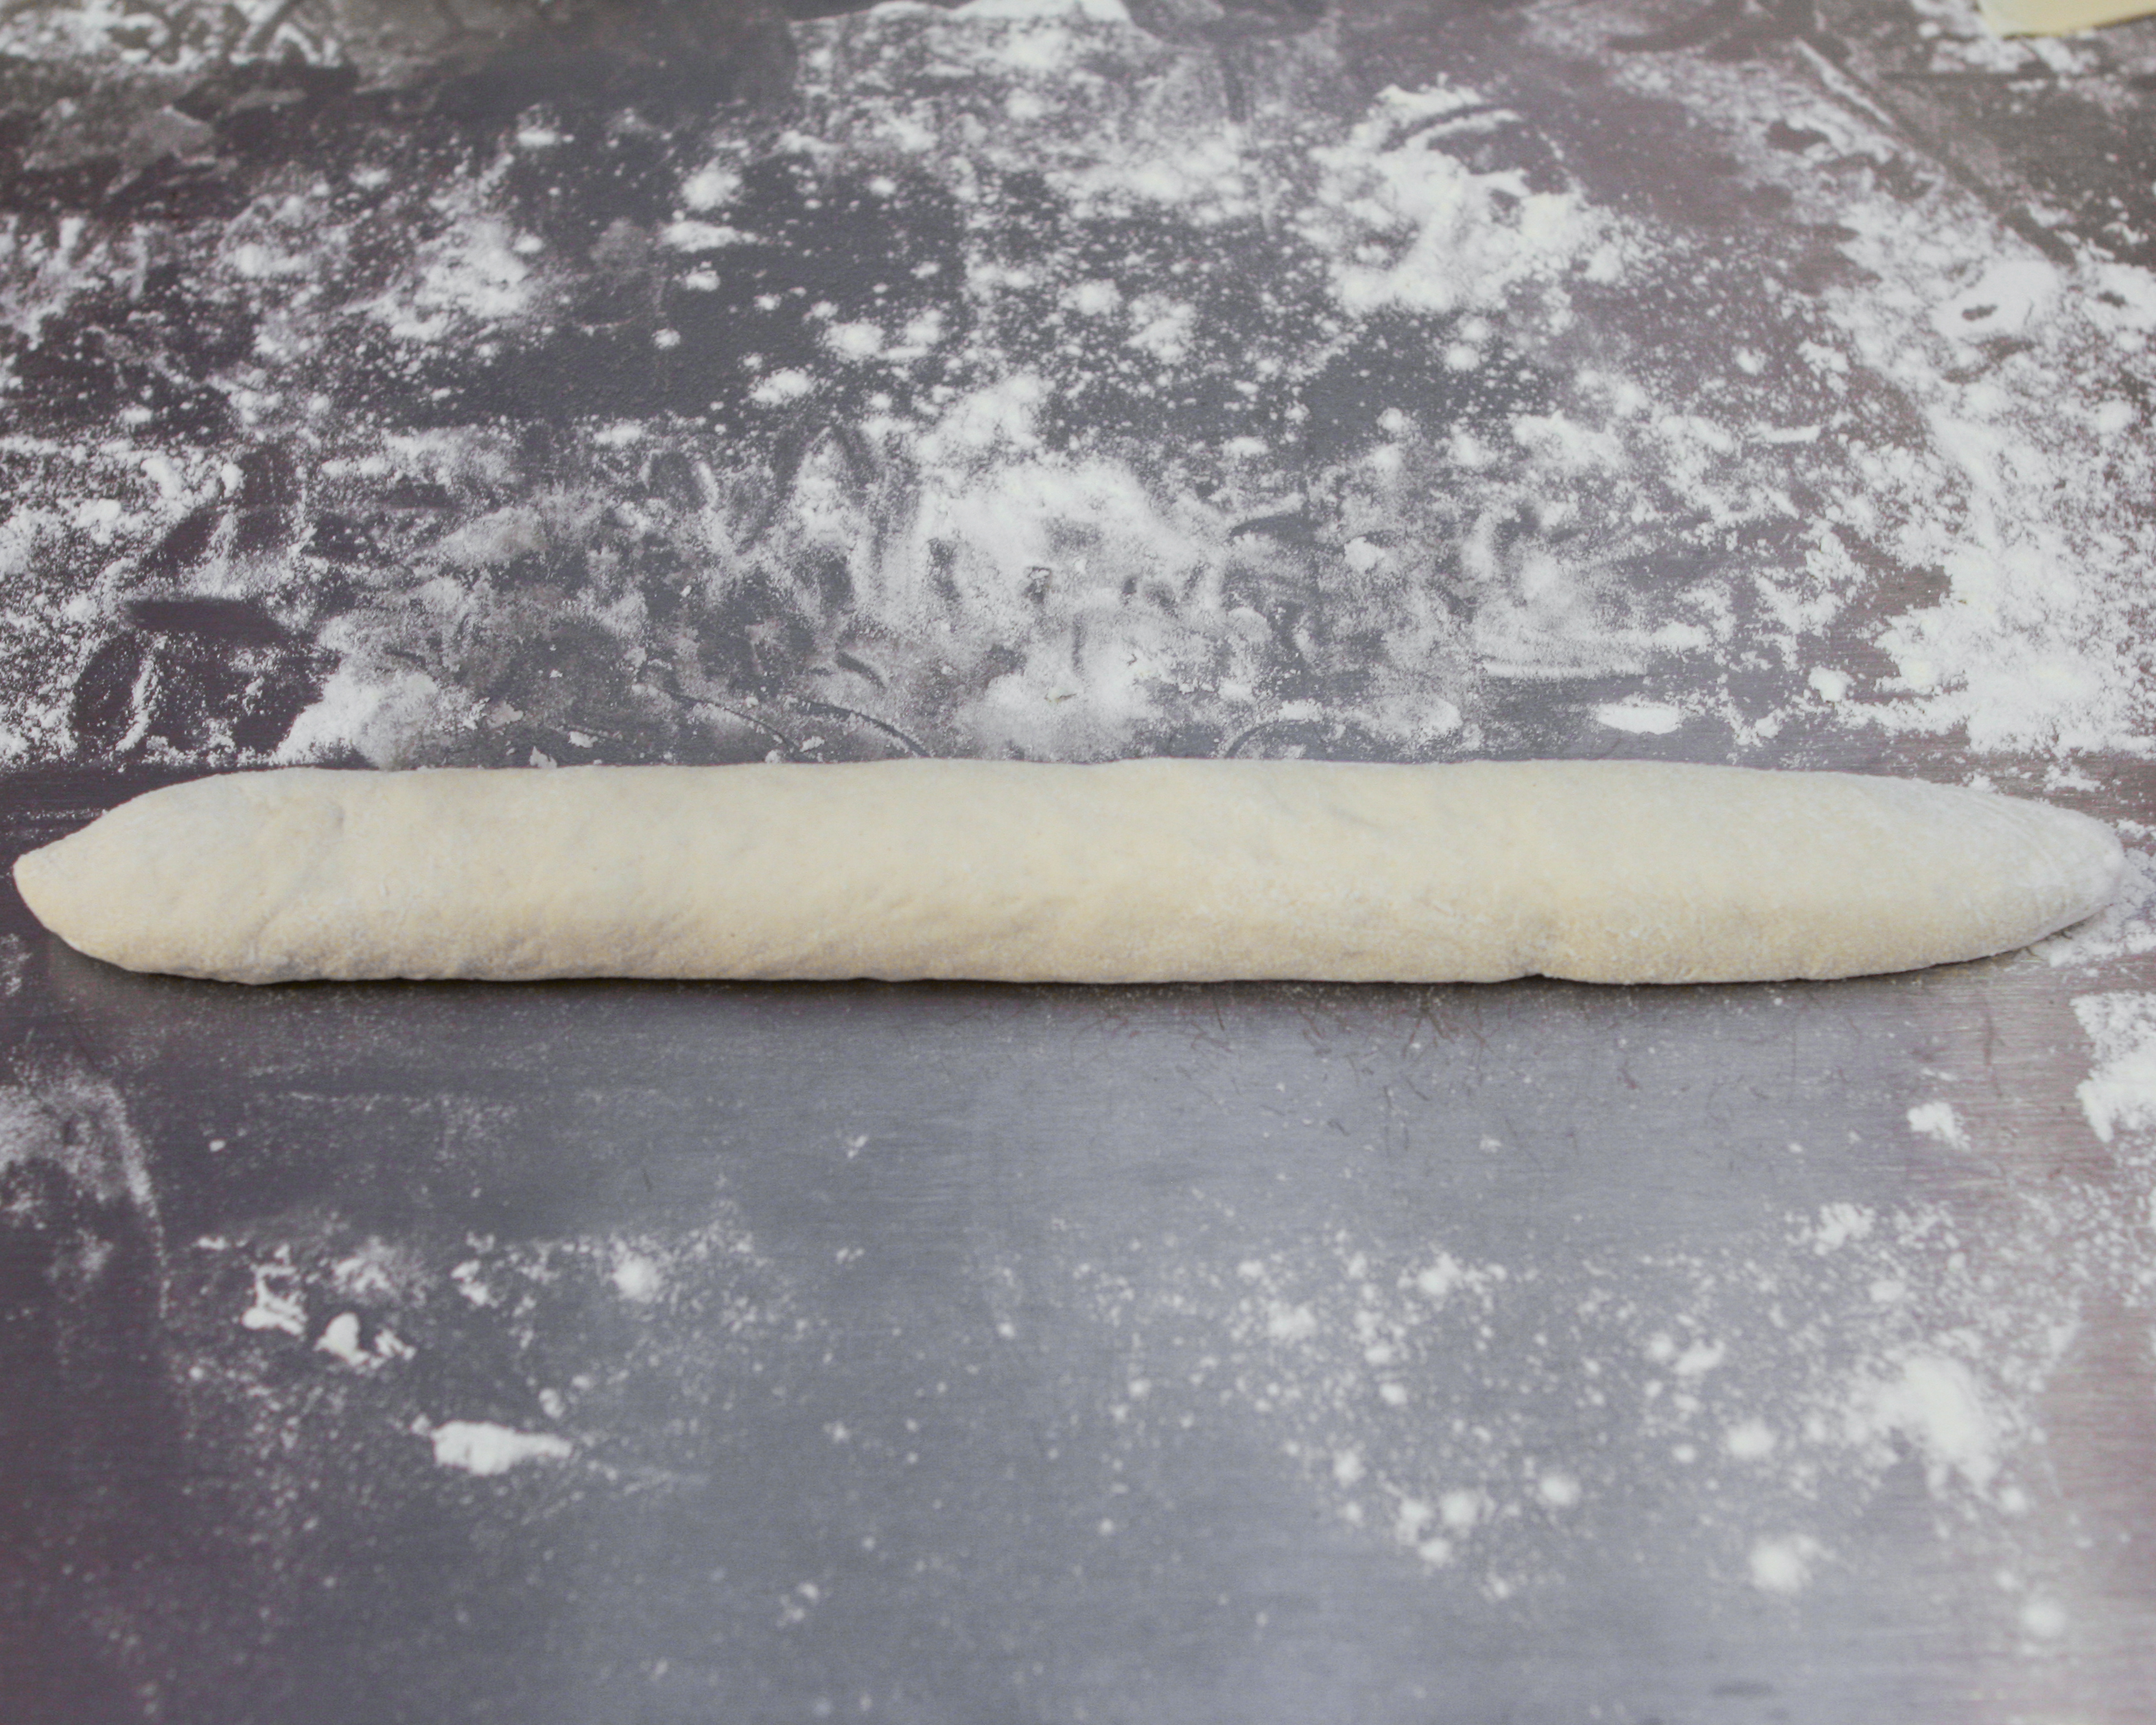
Roll baguette to length of 10-14 inches

Before proofing
After proofing
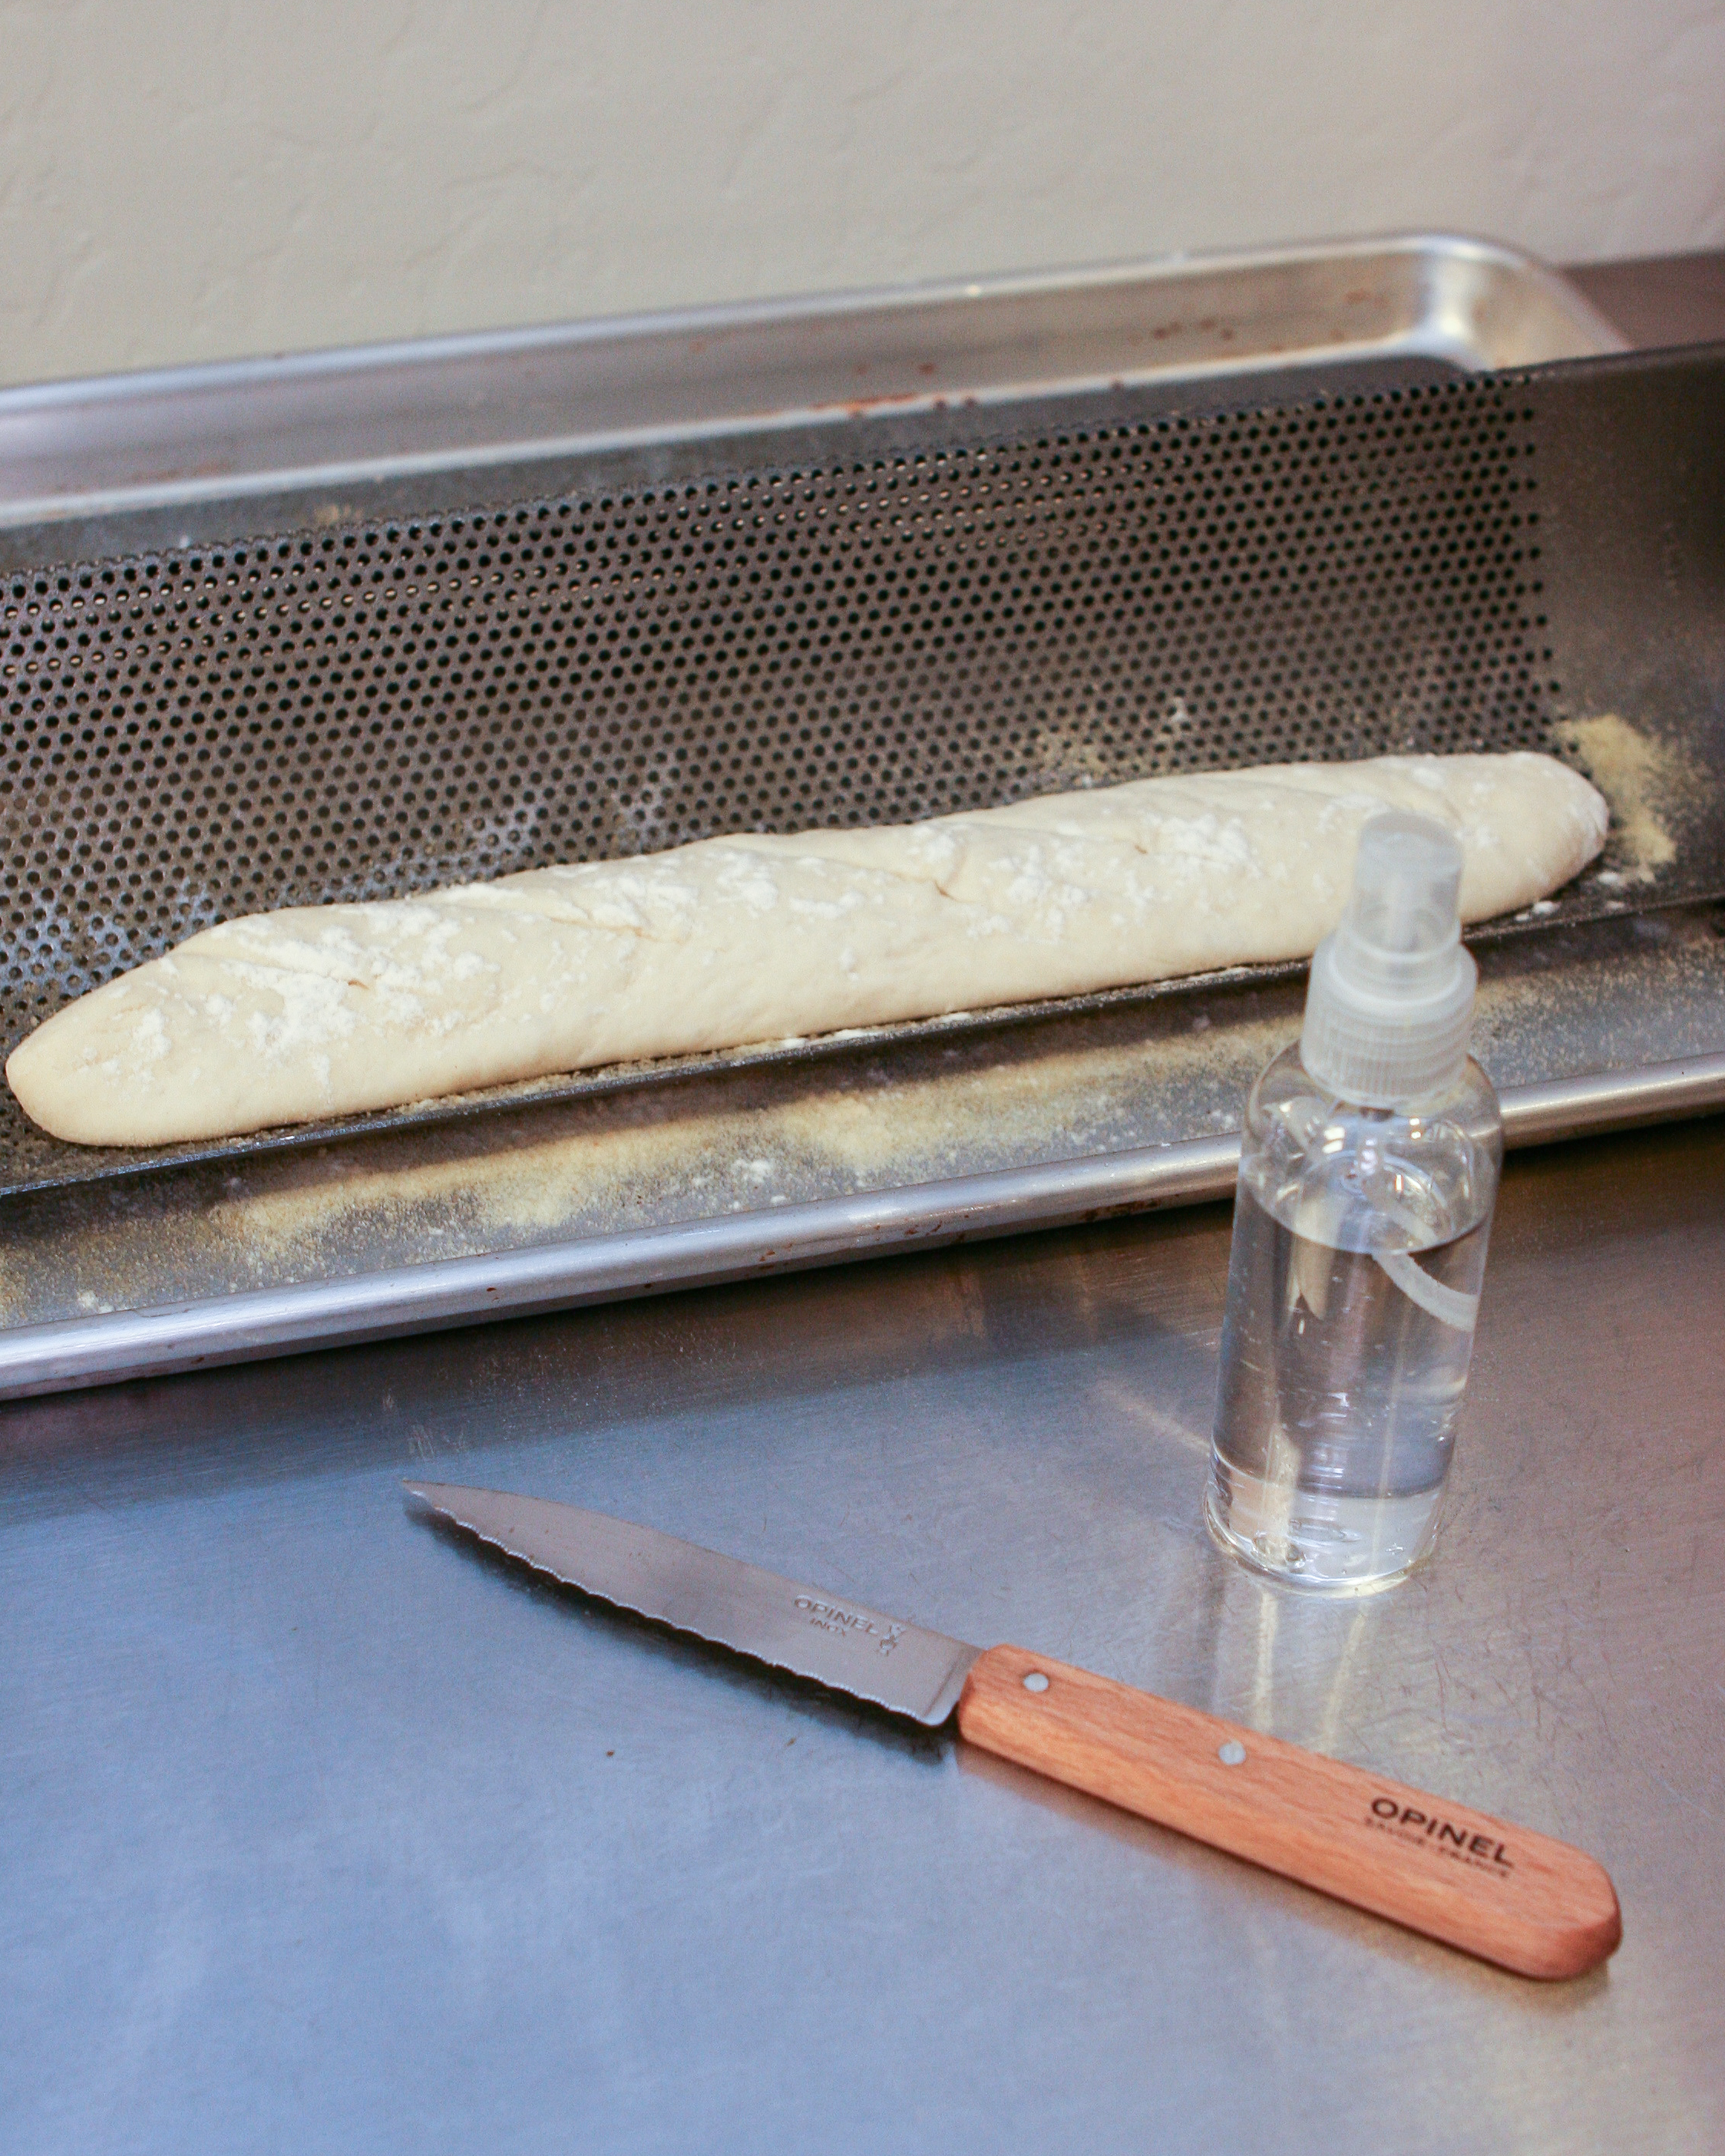
Slash and spray!

A hot water bath will help to make a crisp baguette crust

Angled slashes with a serrated knife make for pretty baguettes
Have leftover baguettes? Make these Tea-Brined Turkey and Roquefort Cheese Sandwiches to finish up those last batons!


